
Tube sizes 1/4", 5/16" and 3/8": which push-fit connector fits?
Saturday morning: the new fridge with water dispenser is finally in place. Only the tube just won't go into the connector – a few millimetres too thick. Back to the DIY store. It happens to many people, because sizes are given in inches, and 1/4", 5/16" and 3/8" look confusingly alike. With this guide you will find the right connector in five minutes – first time round.
Reverse osmosis systems, water filters, fridges with water dispensers and aquariums almost always use thin PE tubing and push-fit connectors. For a leak-free connection, tube and connector must match exactly. Sizes are given in inches – which often causes confusion.
1. The inch size refers to the outside diameter
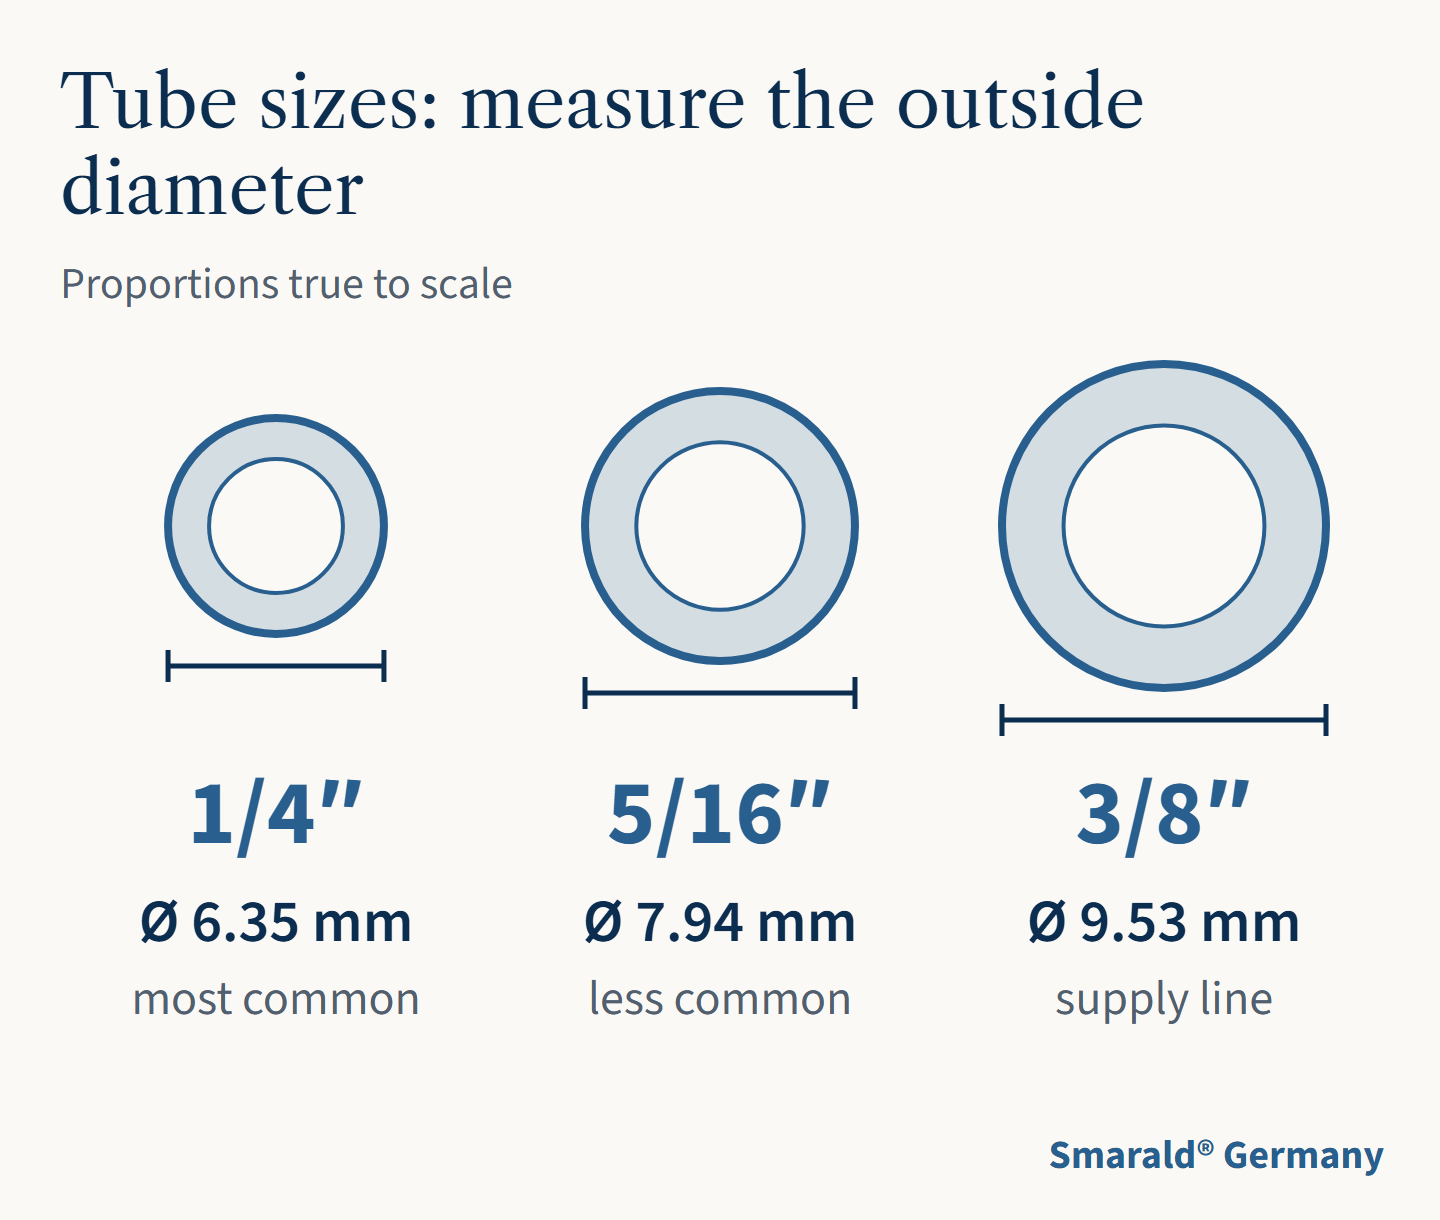
| Size | Outside diameter | Typical use |
|---|---|---|
| 1/4" | 6.35 mm | RO systems, fridges, water dispensers (most common size) |
| 5/16" | 7.9 mm | some RO systems and water dispensers |
| 3/8" | 9.5 mm | supply lines, systems with higher flow |
How to measure: use a caliper or ruler to measure the outside diameter of the tube. 6–6.5 mm is 1/4", just under 8 mm is 5/16", 9–10 mm is 3/8".
No caliper to hand? Use a pencil for comparison – it is about 7 mm thick. A little thinner than the pencil: 1/4". About the same: 5/16". Clearly thicker: 3/8". If in doubt, measure properly.
2. Threads: IG and AG
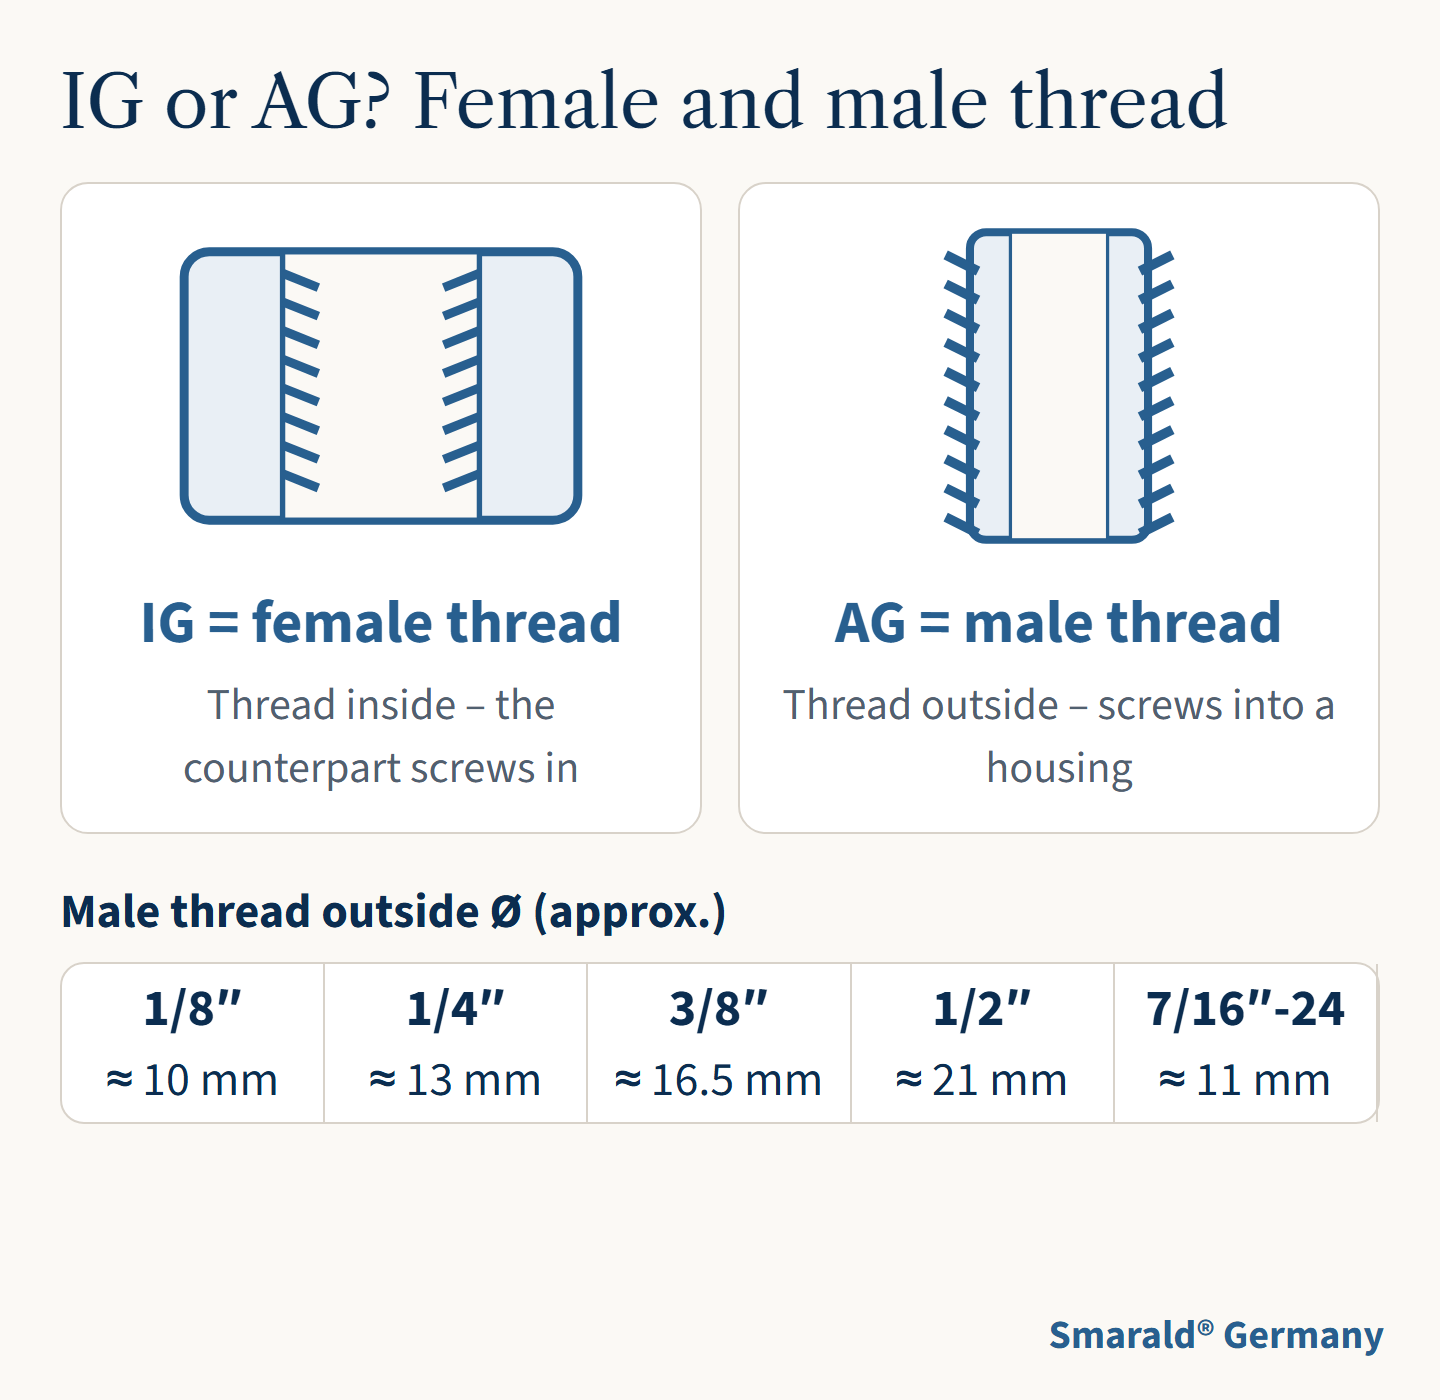
Many connectors have a tube connection on one side and a thread on the other – for example to screw into a filter housing.
- IG = female thread (thread on the inside)
- AG = male thread (thread on the outside)
So “1/4" × 3/8" IG” means: 1/4" tube on one side, 3/8" female thread on the other. Rough guide for the outside diameter of a male thread: 1/8" ≈ 10 mm, 1/4" ≈ 13 mm, 3/8" ≈ 16.5 mm, 1/2" ≈ 21 mm. Fridge connections often use the 7/16"-24 thread (≈ 11 mm).
Easy way to remember: with a female thread the grooves hide inside – like a nut. With a male thread you see them on the outside – like a screw.
3. Which shape do I need?
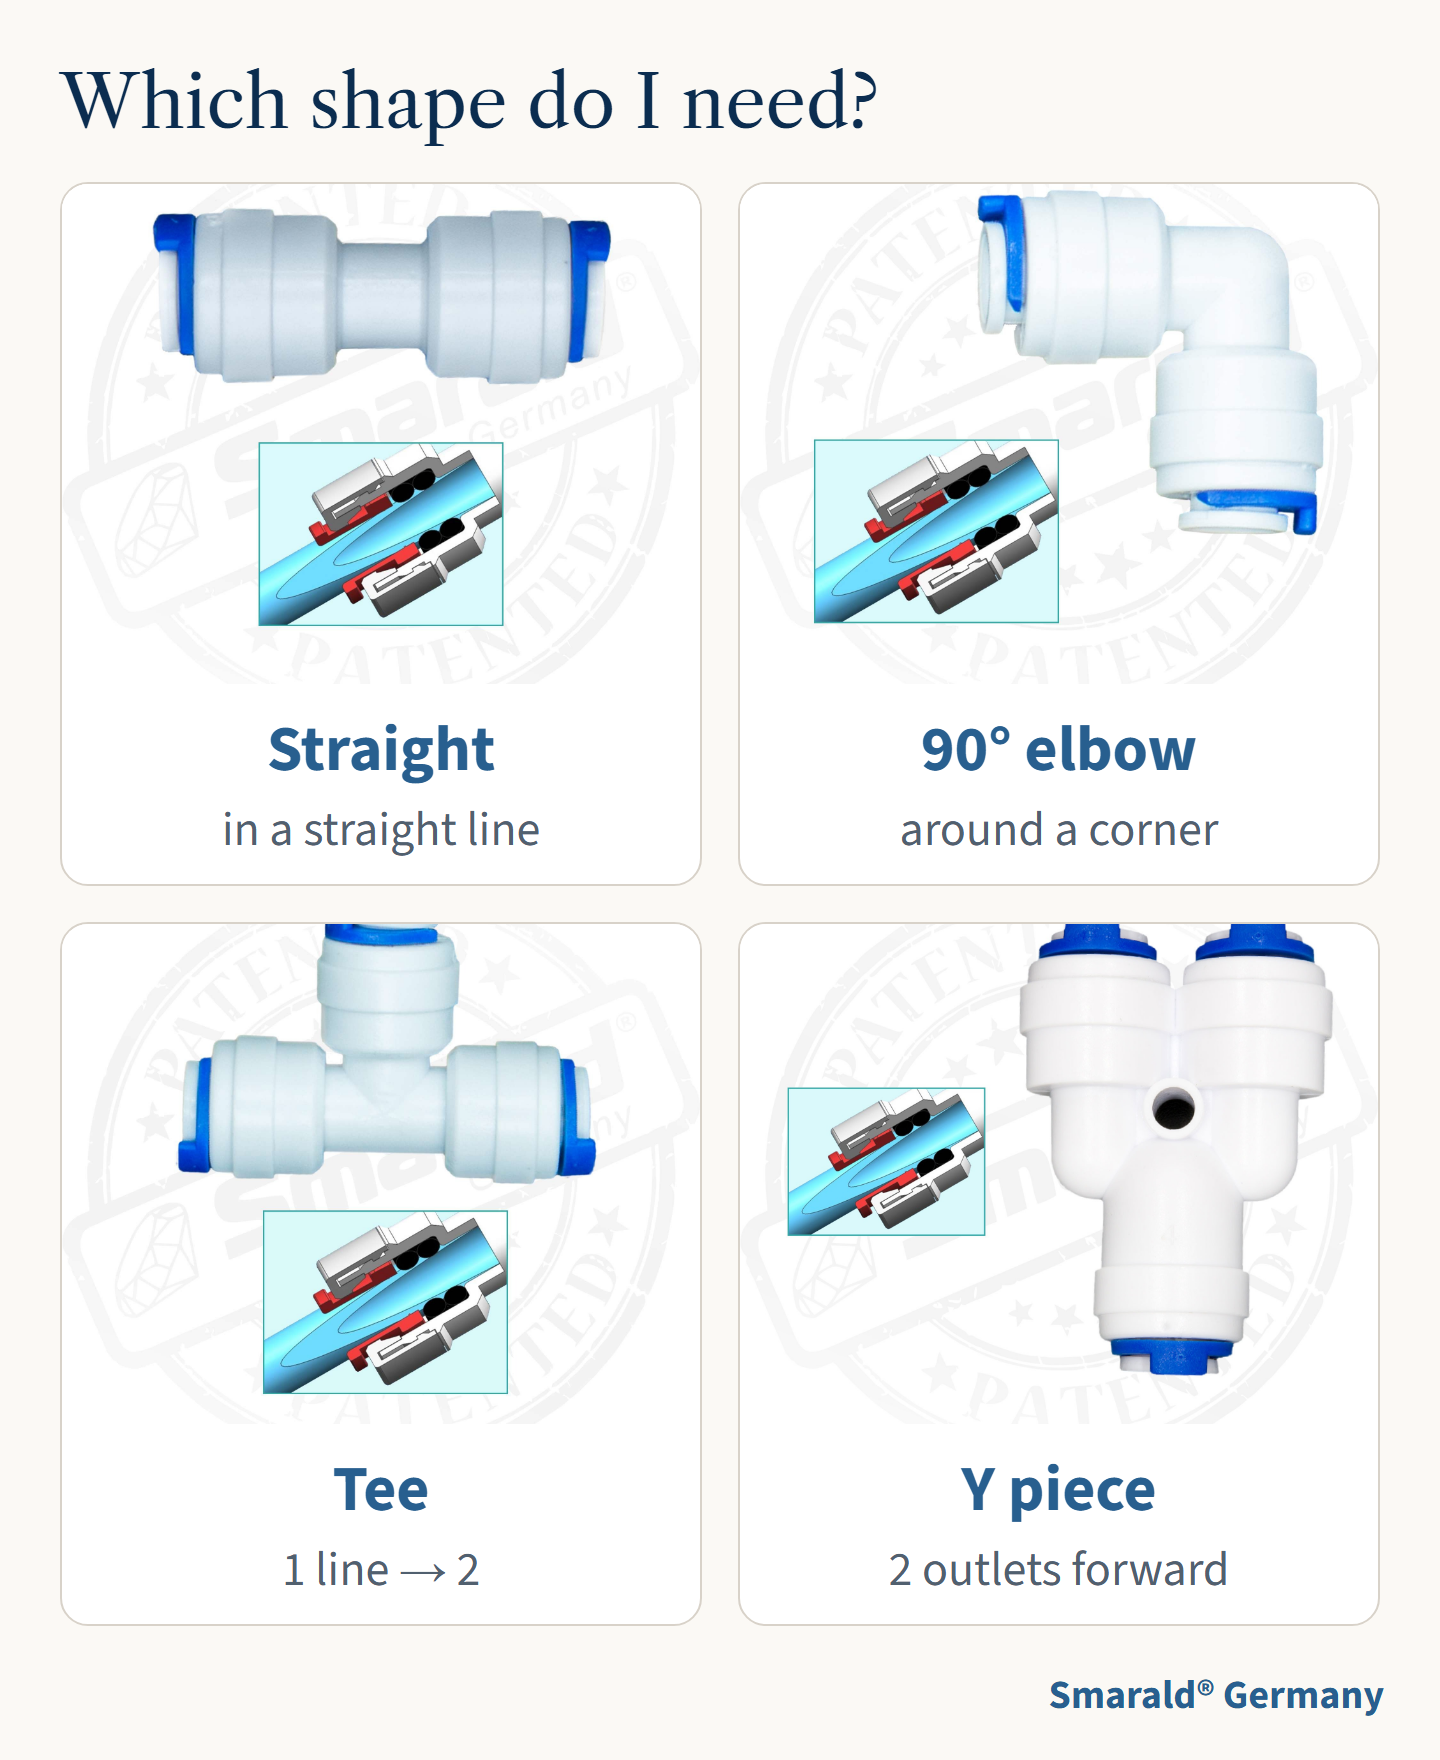
- Straight – connect two tubes, or a tube and a thread, in a line
- 90° elbow – around corners, saves space under the sink
- Tee – split one line into two, e.g. for fridge and tap
- Y piece – like a tee, but with both outlets in one direction
- Reducer – e.g. from 3/8" to 1/4"
4. Installation tips
- Cut the tube straight with a tube cutter – slanted or squashed ends will leak.
- Push the tube in firmly up to the stop, then fit the locking clip.
- To release: shut off the water, remove the clip, press the ring on the connector in and pull the tube out.
- Seal threads without an O-ring with PTFE tape.
The three most common mistakes
- Measuring the inside instead of the outside diameter. You end up ordering one size too small. Always measure the outside.
- Tube not pushed in all the way. It seems to hold but starts dripping after a few hours. Tip: mark the insertion depth on the tube with a pen first – then you can see whether it is fully in.
- Tube nipped off with pliers. The end turns oval and will not seal. Better: a tube cutter or a sharp utility knife, straight and at a right angle.
Matching products in our shop: PE tubing, straight connectors, 90° elbows, tees, Y pieces.
In short: measure the outside diameter – 6.35 mm = 1/4", 7.9 mm = 5/16", 9.5 mm = 3/8". Choose the shape by the route the water should take. Cut the tube straight and push it in all the way.
Not sure which size you have? Send us a photo with a ruler to kontakt@smarald.com – we are happy to help.